
Here you will learn how to control any browser application with a little Python and selenium. You can use this for creating your own Instagram Bot for example. We start with a few basics and end with a cheat sheet summarizing the most important code snippets. Let’s go!
Basic automation with “Selenium IDE”
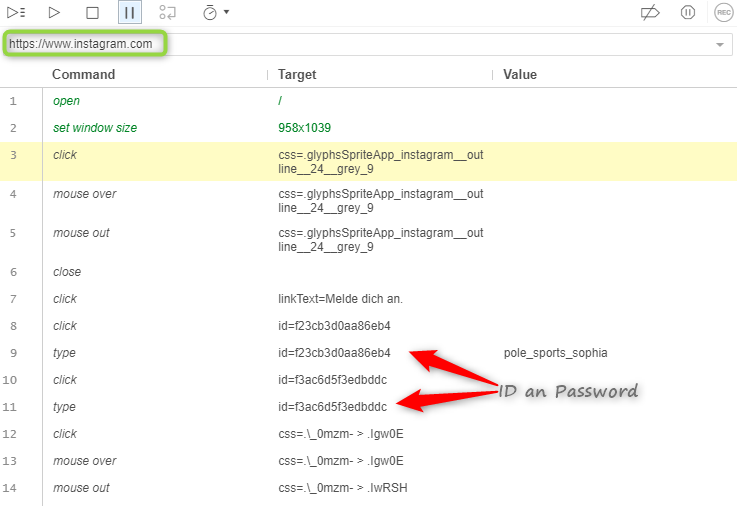
One way to automate the tasks that are performed in the browser is to use a program that “records” your activities on the website and can play them back as often as you like. No coding is needed for this. Correspondingly stupidly the program executes its steps.
You can find a Chrome extension here, that allows you to record and play your tasks. Now this works for logging into Instagram well, but we need some kind of programming to make our automation a bit smarter.
Below I have added an example of how such a login via Selenium might look like. He notes all necessary HTML IDs to be able to access them directly later. If Instagram should change the IDs at a later time, the user will surely not notice it. The bot will still not find the individual parts again and will fail.
Automate via our own Python Script
First of all. We will not directly control the browser. We will write a script that uses a web driver to control a browser. For example, our Python script will use a ChromeDriver to control the web browser Google Chrome.
So we need Selenium and a Webdriver.
- Selenium: You can install selenium via “pip3 install selenium” inside for example Powershell.
- Webdriver: You can download it from the SeleniumHQ Website for your preferred Browser.
When using the program, you can set the path to the driver like this (Old way):
from selenium import webdriver
options = webdriver.ChromeOptions()
driver = webdriver.Chrome(executable_path="path/to/chromedriver.exe",
chrome_options=options)
There is a better way to start. Create a new python Script and let it download and set chromedriver by itself. For that, we need “webdriver manager”:
pip install webdriver-managerIs this installed, you can now create a little Python file and run it to open a specific Website. In my case Instagram:
#Imports
from selenium import webdriver
from webdriver_manager.chrome import ChromeDriverManager

#Time for see that the Browser will open
import time
#Doing
driver = webdriver.Chrome(ChromeDriverManager().install())
driver.get('https://www.instagram.com')

#Closes Browser after one Second
time.sleep(1)
driver.quit()Instagram as our playing ground
You can see the whole HTML Code right inside the Browser. Just right click and click “inspect”. You can also press “Ctrl + Shift + I”. You can use this to see all the IDs and points we will use to automate.

In Python, you now can use the “driver.find_element” to address exactly one spot. By their specific name or class or ID. Whatever suits you the most: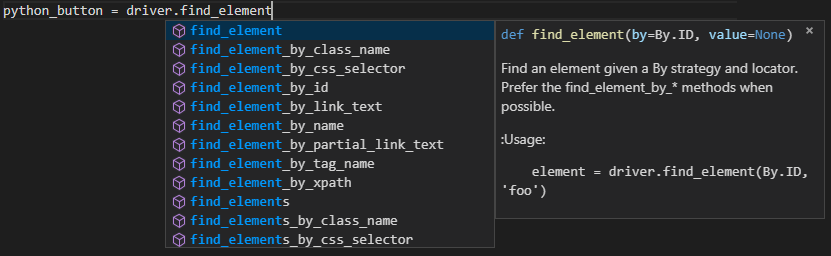
In my case, the Button doesn’t have any ID. So I have to target it via the “XPath” and search for the text inside the button. Each element has its own path. We can either search using the absolute path, which would result in errors if we changed the website structure. Or we search within our specified path for a word. Here the structure of the website can change as much as it wants, our word is always found.
In our case, it’s the word “next”. This way we can make sure that we notice when Instagram changes something as soon as possible because you have to change it so that it is changed for the user.
How to find your XPath and use it inside your Script
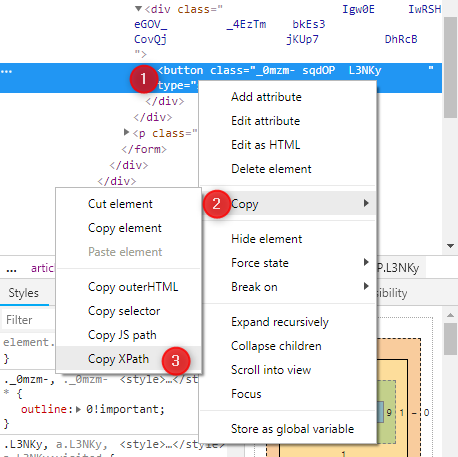
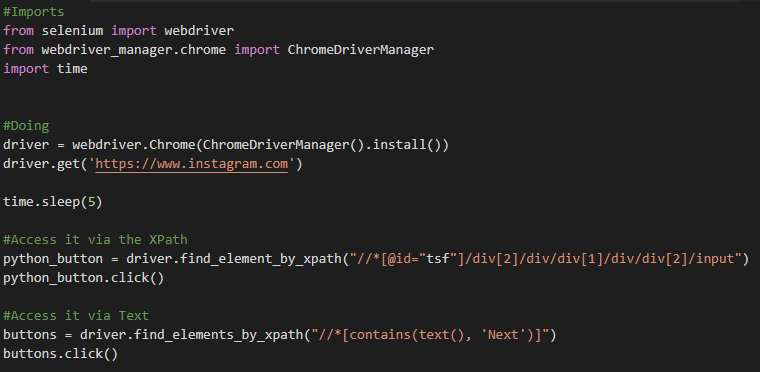
You now can find and click the button via the text the user can see, or via the XPath, you have copied above. The following Script will open Instagram, and waits 5 seconds till it clicks the Next Button. Of course, it won’t log in, because there is no data typed in.
Cheat Sheet
xxx will be your variable which contains the XPath or name. In our Example above it would be “python_button”.
| Radio Button | xxx.click() |
| Click Checkbox | |
| Click Button | |
| Textfield | xxx.send_keys(“Hello World!”) |
| Getting Text | xxx.get_attribute(“text”) |
| Dropdown by visible text | xxx.select_by_visible_text(‘Germany’) |
| Dropdown by value | xxx.select_by_value(‘1’) |