

We all know that. If we have more than one end device, in my case a laptop and a computer, files are missing on one side that has been used on the other. That can be time-consuming as hell. This problem can be solved with “Syncthing” a peer to peer network and a small Windows task. It is open source and decentralized. Your data is yours. Syncthing takes over the data synchronization and the Windows task set up to start the service in the background. Thus all devices are always up to date.
This is no sponsored post, I just love this program and use it frequently at home.
Setting up Syncthing
First download Syncthing, unzip and run it.
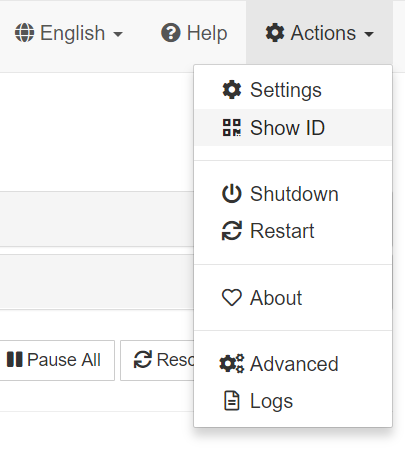
The IP Adress http://127.0.0.1:8384/ will open in your Browser. At the top right corner is a gear with “Action” next to it. Click “Show ID”. You will find a QR Code and a number. This is the number you need for connecting to each other. Any PC which runs Syncthing will get its own number.
This number is needed for the next step. Do this step on all devices you want to connect. That’s the Device ID.
Sync a folder on two devices (or more)
Remote devices
The first thing you wanna do is to connect the two devices. For that you click on “add Remote Device” in the right lower corner. You now can play with the “General” and “Sharing” Settings.
General: The “Device ID” is the number of your computer you want to connect with. “Device Name” is a local name you set for your own tidiness if there are many devices.
Sharing: Personally I check the checkbox “Introducer” and check all devices I want to connect with. You maybe won’t see anything under “Share Folders With Device”, because we didn’t create a folder yet. Now we click “Safe” and create a Folder we want to share.
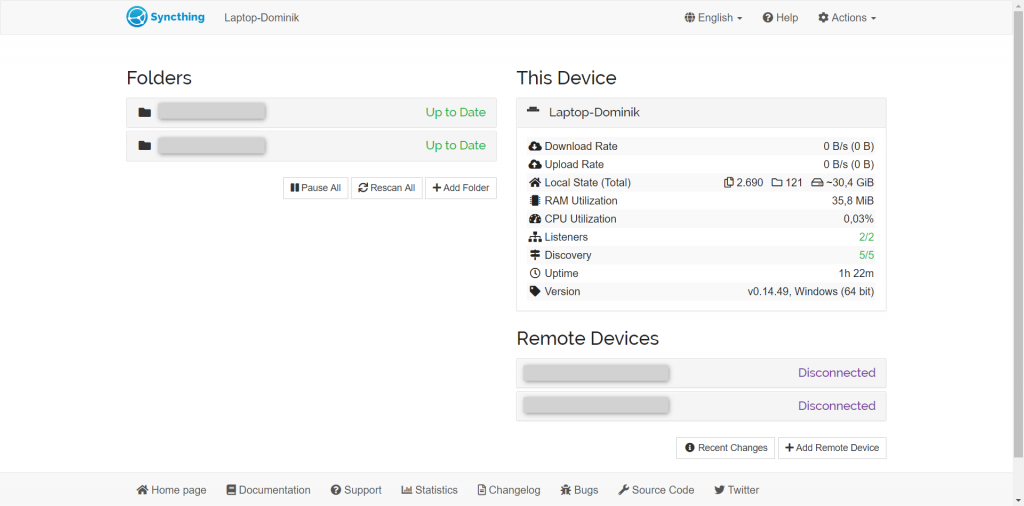
Folders
We now can create our first folder. Anything in this will be synced. For this we click “Add folder”. Folder Label is just for your device local. The important thing is the “Folder path”. Here you set the parent folder which will be synchronized. Tip: This folder path can be different on any device and is set on each device separately. After choosing a path, set the checkbox on all devices you want to connect, click save and you are ready to go!
Task Scheduler for no manual start anymore (Windows)
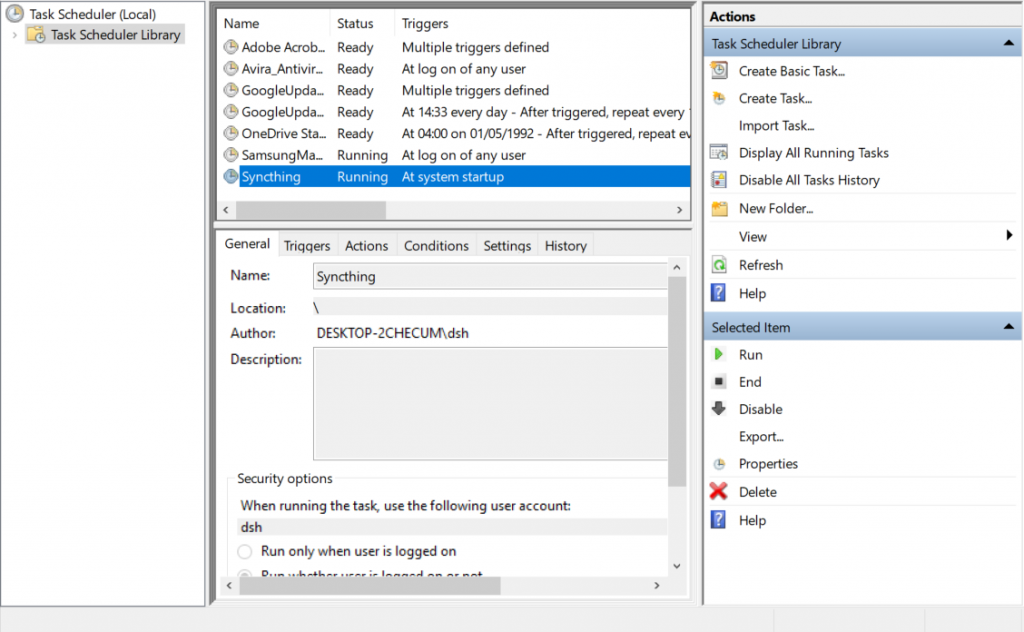
Start Task Scheduler. You can just search and start it. What’s the goal: We want a task which will be started when the PC is running, without starting it manually.
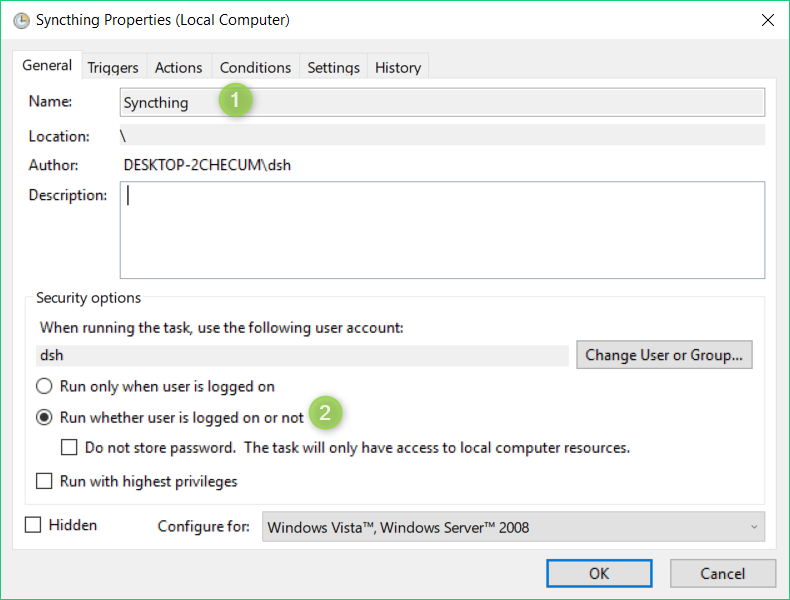
First things first. Click on “Action” menu the “Create Task…”. Now we see different Tabs. On the General Tab, we just Name the task (for example ‘Syncthing’) and press the Button “Run whether user is logged on or not”.
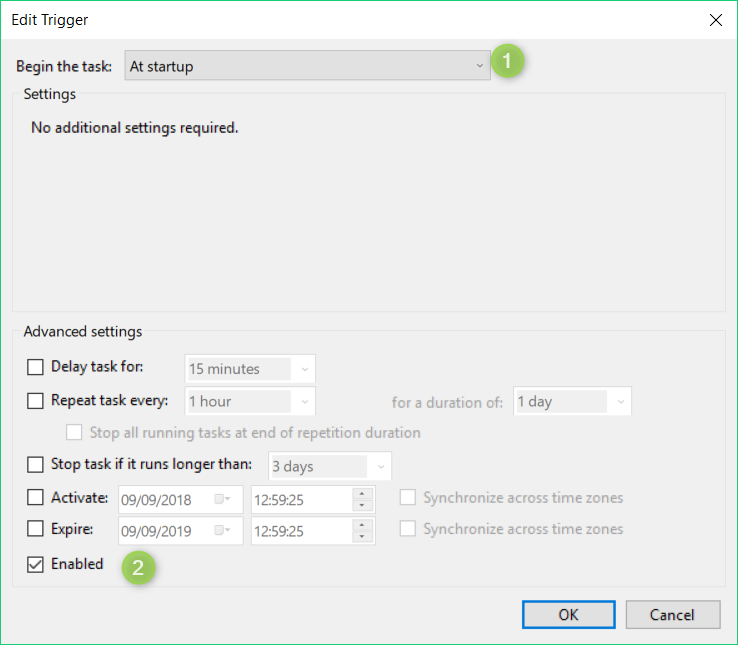
Next, we are setting up a Trigger, which will – of course – trigger the task. Here we click “New…”, then set the “Begin the task” to “At Startup”, make sure Enabled is checked and press “Ok”.
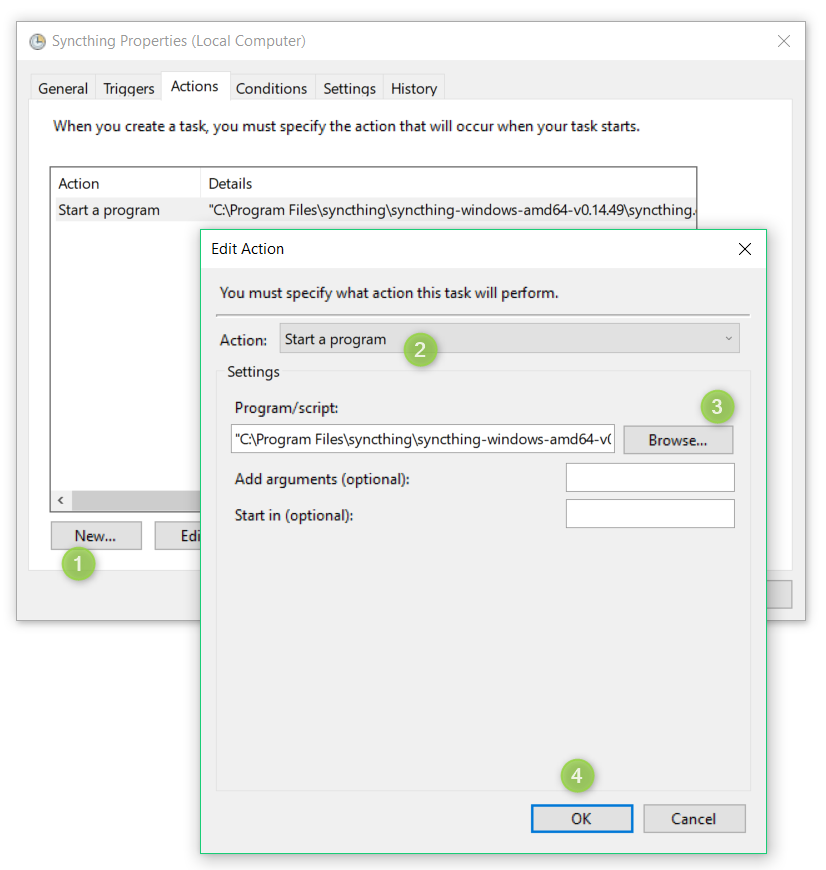
On the Actions Tab, we click “New…”, the Action is set as “Start a program” and finally we need to enter the path to syncthing.exe which we can easily find through “Browse”.
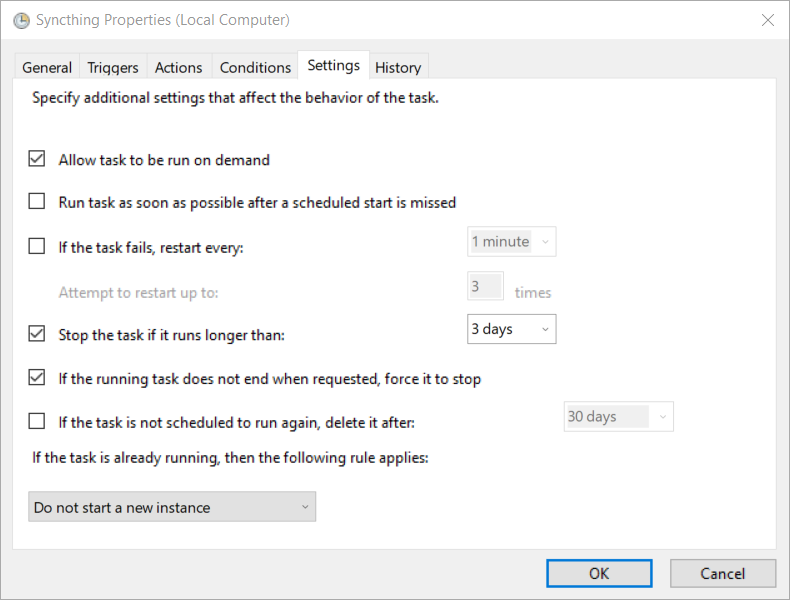
We skip the conditions and get right into the settings. In this Tab, I set anything you see in the picture below. Then type in your password, that the Task will get the right permissions.
Tip: Restart your PC and check if you can get access to your Syncthing IP Adress without starting Syncthing (in my case it’s http://127.0.0.1:8384/). That’s the proof your task is running 🙂
Finally, you have set up your connection yourself. All you need is Syncthing and a little Windows Task to set anything running.